
티스토리 뷰
AWS SES를 이용하여 사용자에게 이메일을 발송할 때 발신자 정보는 기본적으로 발신자 이메일로 설정됩니다.
그런데 발신자 정보를 발신자 이메일이 아닌 다른 값으로 세팅해줘야 하는 상황이 있을 수 있는데요.
그 방법에 대해 예제코드로 알아보도록 하겠습니다.
예제코드
1 2 3 4 5 6 7 8 9 10 11 12 13 14 15 16 17 18 19 20 21 22 23 24 25 26 27 28 29 30 31 32 33 34 35 36 37 38 39 40 41 42 43 44 45 46 47 48 49 50 51 | package com.example.demo.service; import com.amazonaws.services.simpleemail.AmazonSimpleEmailService; import com.amazonaws.services.simpleemail.model.*; import org.springframework.stereotype.Service; import java.nio.charset.Charset; import java.nio.charset.StandardCharsets; @Service public class AmazonEmailService { private static final Charset UTF_8 = StandardCharsets.UTF_8; private static final String FROM = "발신자 이메일 주소"; private final AmazonSimpleEmailService amazonSimpleEmailService; public AmazonEmailService(AmazonSimpleEmailService amazonSimpleEmailService) { this.amazonSimpleEmailService = amazonSimpleEmailService; } public void sendEmail(String subject, String body, String... to) { SendEmailRequest sendEmailRequest = createSendEmailRequest(subject, body, to); amazonSimpleEmailService.sendEmail(sendEmailRequest); } private SendEmailRequest createSendEmailRequest(String subject, String body, String... to) { return new SendEmailRequest() .withDestination(createDestination(to)) .withSource(FROM) .withMessage(new Message() .withSubject(createSubject(subject)) .withBody(createBody(body)) ); } private Destination createDestination(String... to) { return new Destination().withToAddresses(to); } private Content createSubject(String subject) { return createUTF8Content().withData(subject); } private Body createBody(String body) { return new Body().withHtml(createUTF8Content().withData(body)); } private Content createUTF8Content() { return new Content().withCharset(UTF_8.name()); } } | cs |
AWS SES SDK를 이용하여 사용자에게 이메일을 발송하는 예제코드입니다.
1 2 3 4 5 6 7 8 9 10 11 12 13 14 15 16 17 18 19 20 21 22 23 24 25 26 | import org.junit.jupiter.api.DisplayName; import org.junit.jupiter.api.Test; import org.springframework.beans.factory.annotation.Autowired; import org.springframework.boot.test.context.SpringBootTest; @SpringBootTest public class AmazonEmailServiceTests { @Autowired AmazonEmailService amazonEmailService; @Test @DisplayName("AWS SES를 이용하여 이메일 전송하기") void sendEmail() { String subject = "Notification Message"; String body = """ <html> <body> <h1>테스트 메세지</h1> </body> </html> """; String to = "수신자 이메일 주소"; amazonEmailService.sendEmail(subject, body, to); } } | cs |
이메일을 발송하는 예제 테스트 코드입니다. 이제 테스트 코드를 실행하여 이메일을 발송해보겠습니다.

정상적으로 발송되었지만 보낸 사람은 발신자 이메일 주소로 표기되었습니다. 이제 이 부분을 변경해보도록 하겠습니다.
발신자 정보 변경 (영문)
1 2 3 4 5 6 | @Service public class AmazonEmailService { // private static final String FROM = "발신자 이메일 주소"; private static final String FROM = "kimjonghyun <발신자 이메일 주소>"; } | cs |
발신자 정보를 위처럼 세팅해줄 수 있습니다. 다시 한번 이메일을 발송해보겠습니다.
발신자 정보가 세팅했던 값으로 변경되어 발송되었습니다.
발신자 정보 변경 (한글)
1 2 3 4 5 6 | @Service public class AmazonEmailService { // private static final String FROM = "발신자 이메일 주소"; private static final String FROM = "김종현 <발신자 이메일 주소>"; } | cs |
이제 발신자 정보를 한글로 변경해서 테스트를 진행해보겠습니다.
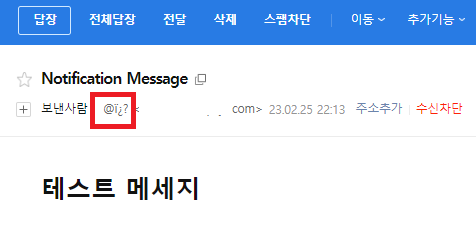
발신자 정보를 한글로 변경하니 한글이 깨진 걸 확인할 수 있습니다. 한글이 깨진 원인을 파악해야 하는데
원인 및 해결법은 AWS SES의 공식 문서에서 확인할 수 있습니다.
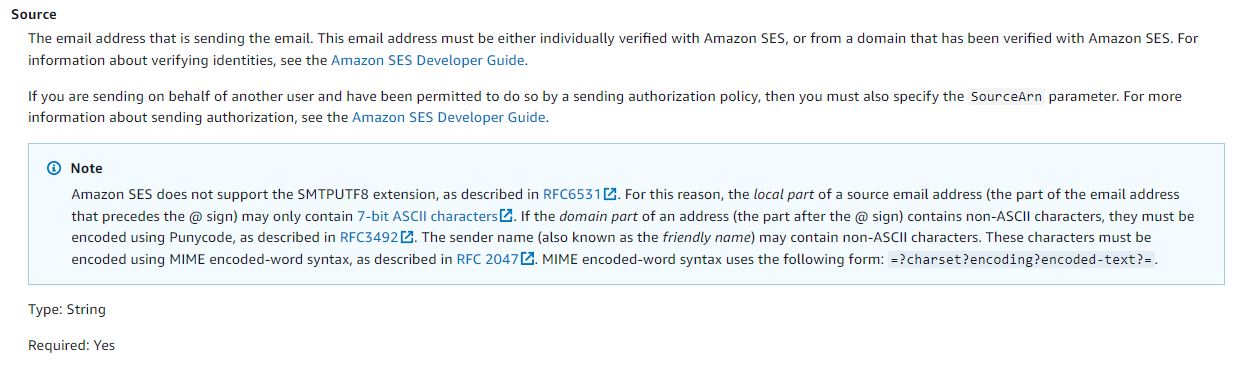
내용을 번역하자면 다음과 같습니다.
Amazon SES는 RFC6531에 설명된 대로 SMTPUTF8 확장을 지원하지 않습니다. 이러한 이유로 원본 이메일 주소의 로컬 부분(@ 기호 앞에 오는 이메일 주소 부분)에는 7비트 ASCII 문자만 포함될 수 있습니다. 주소의 도메인 부분(@ 기호 다음 부분)에 ASCII가 아닌 문자가 포함된 경우 RFC3492에 설명된 대로 Punycode를 사용하여 인코딩해야 합니다. 보낸 사람 이름에는 ASCII가 아닌 문자가 포함될 수 있습니다. 이러한 문자는 RFC 2047 에 설명된 대로 MIME 인코딩된 단어 구문을 사용하여 인코딩해야 합니다. MIME 인코딩된 단어 구문은 =?charset?encoding?encoded-text?= 형식을 사용합니다.
즉, 정리하자면 SMTP UTF8을 지원하지 않습니다. 한글은 ASCII가 아니기 때문에 RFC 2047에 설명된 대로 MIME 타입으로 인코딩된 단어를 사용해야 합니다. 구문은 =?charset?encoding?encoded-text?= 가 됩니다.
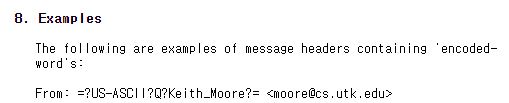
위 예제코드를 참고하여 발신자 정보를 아래처럼 변경해보겠습니다.
1 2 3 4 5 6 7 8 9 10 11 12 13 14 15 16 17 18 19 20 21 22 | @Service public class AmazonEmailService { private static final Charset UTF_8 = StandardCharsets.UTF_8; private static final String FROM = "발신자 이메일 주소"; private static final String ENCODED_TEXT = Base64.getEncoder().encodeToString("김종현".getBytes(UTF_8)); private static final String SOURCE = "=?UTF-8?B?" + ENCODED_TEXT + "?= <" + FROM + ">"; .... .... private SendEmailRequest createSendEmailRequest(String subject, String body, String... to) { return new SendEmailRequest() .withDestination(createDestination(to)) .withSource(SOURCE) .withMessage(new Message() .withSubject(createSubject(subject)) .withBody(createBody(body)) ); } } | cs |
물음표(?) 중간에 있는 'B' 의 의미는 인코딩된 텍스트가 Base 64로 인코딩 되어져 있다는 걸 의미합니다.
이제 다시 한번 테스트를 진행해보겠습니다.
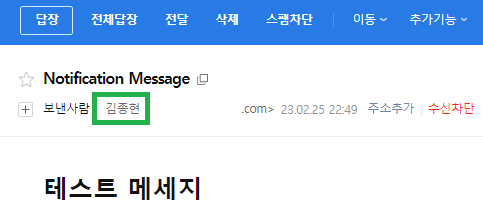
한글로 정상적으로 변경된 걸 확인하실 수 있습니다.
'AWS' 카테고리의 다른 글
| Amazon EventBridge Scheduler에 대해 알아보기 (1) | 2023.04.10 |
|---|---|
| Solutions Architect - Associate (SAA-C03) 자격증 취득 및 시험공부법 (4) | 2022.12.14 |
| 회사에 매달 청구되는 aws 비용을 1,000 달러이상 절감했던 이야기 (8) | 2022.07.05 |
| S3와 Aurora MySQL 연동하기 (0) | 2022.05.07 |
| MFA (Multi Factor Authentication) 적용 및 Authenticator 계정 백업 (0) | 2022.04.17 |