
티스토리 뷰
사용자에게 메일을 발송할 때 기존에는 Daum에서 제공하는 SMTP 서비스를 사용했었습니다. 근데 간헐적으로 메일발송이 되지 않거나 10~20분 후 발송되는 현상이 있어서 SMTP 서비스를 AWS SES로 바꾸기로 하였습니다.
그래서 이번 글에서는 AWS SES와 Spring Boot로 이메일 전송기능을 만드는 작업을 정리해보겠습니다.
위에서부터 순서대로 진행하시면 문제없이 만드실 수 있습니다.
AWS SES 세팅
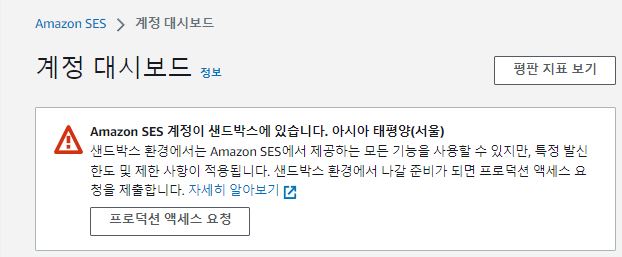
AWS 계정을 만들고 SES 서비스를 처음 이용하면 해당 계정은 샌드박스에 있습니다. 이 샌드박스에 있으면 다음과 같은 활동이 제한됩니다.
- 자격증명된 이메일로만 메일을 보낼 수 있습니다.
- 24시간 동안 최대 200개의 메세지를 보낼 수 있습니다.
- 초당 최대 1개의 메세지를 보낼 수 있습니다.
웹 서비스를 운영하는 사이트에서는 일일 발송량이 몇백 건, 몇천 건 그 이상이 발송될 수 있고 사용자 이메일 주소는 AWS SES 자격증명이 되지 않았으니 샌드박스 환경에서는 적용할 수 없습니다. 샌드박스 환경에 나가기 위해서는 프로덕션 액세스 요청을 하면 됩니다.
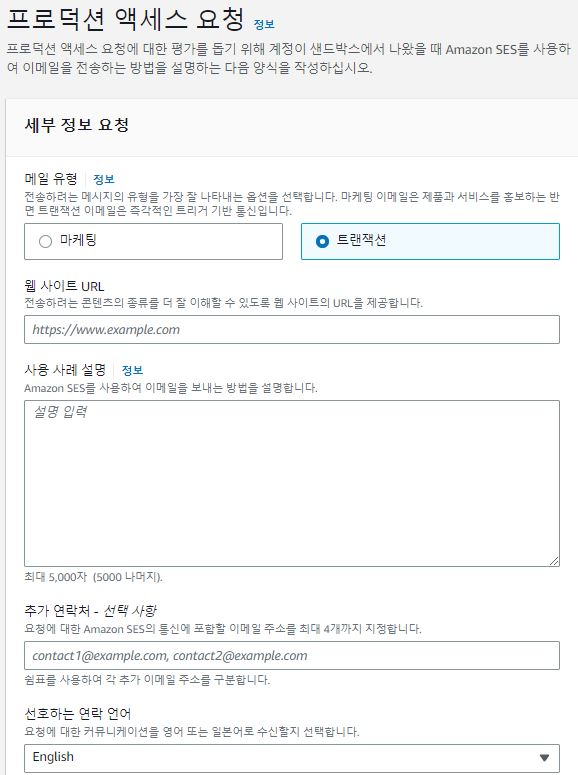
세부 정보 요청항목을 입력합니다. 메일 유형은 트랜잭션으로 지정해두고 웹사이트 URL은 현재 운영 중인 사이트 URL
추가 연락처는 요청에 대한 응답을 받을 메일주소와 응답을 받을 수신언어를 지정합니다.
사용 사례 설명은 어떤 목적으로 사용할 것인지 적으면 되는데 옆에 정보 버튼을 클릭하면 3가지의 질문항목이 있습니다.
그 질문항목에 대한 답변을 적어주시면 됩니다.
(트랜잭션 메일 유형은 여기를 참조해주세요.)
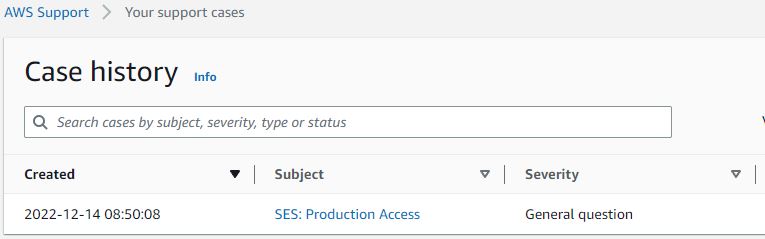
요청을 보내면 AWS Support > Your support cases 메뉴에서 확인하실 수 있습니다.
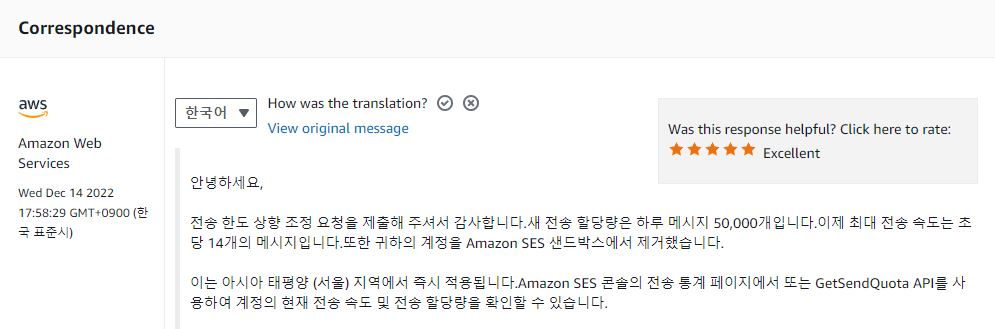
요청에 대한 문의 답변을 받아볼 수 있습니다. 처리시간은 모르겠지만 저는 요청 보내고 10분 정도 지나서 샌드박스에 제거되었다는 내용을 전달받았습니다.
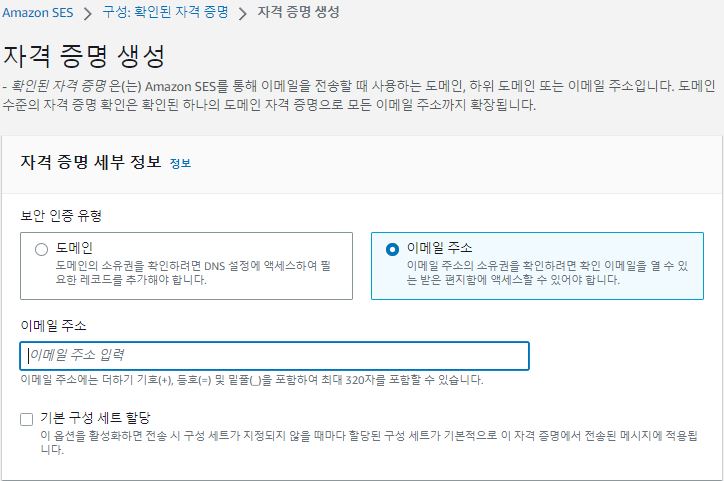
이메일을 발송하려면 발송 이메일주소가 필요하니 입력해줍니다. 생성하게 되면 입력한 메일로 인증 메일이 오게 됩니다.

인증을 하게 되면 보안 인증 상태가 확인됨으로 변경된 걸 확인하실 수 있습니다.

마지막으로 AmazonSESFullAccess 권한을 가진 IAM 사용자를 생성하도록 합니다. IAM 사용자의 accessKey와 secretKey로 Spring Boot 애플리케이션에서 AWS Credentials 인증이 필요하기 때문입니다.
생성 링크는 여기를 참고하시면 됩니다.
여기까지 진행하셨으면 AWS SES 세팅은 끝났습니다. 이제 Spring Boot 애플리케이션을 생성해보겠습니다.
Spring Boot 애플리케이션 구성
1 2 3 4 5 6 | dependencies { implementation 'org.springframework.boot:spring-boot-starter-web' implementation 'org.springframework.boot:spring-boot-starter-thymeleaf' implementation 'com.amazonaws:aws-java-sdk-ses:1.12.408' testImplementation 'org.springframework.boot:spring-boot-starter-test' } | cs |
AWS SES 라이브러리와 Thymeleaf 라이브러리를 추가해줍니다. Thymeleaf를 추가한 이유는 메일을 전송할 때 템플릿 형식의 Email을 전송하기 위함입니다.
1 2 3 4 5 6 7 8 9 10 11 12 13 14 15 16 17 18 19 20 21 22 23 24 25 26 27 28 29 30 | package com.example.demo.configuration.aws; import com.amazonaws.auth.AWSStaticCredentialsProvider; import com.amazonaws.auth.BasicAWSCredentials; import com.amazonaws.regions.Regions; import com.amazonaws.services.simpleemail.AmazonSimpleEmailService; import com.amazonaws.services.simpleemail.AmazonSimpleEmailServiceClientBuilder; import org.springframework.beans.factory.annotation.Value; import org.springframework.context.annotation.Bean; import org.springframework.context.annotation.Configuration; import org.springframework.context.annotation.Profile; @Configuration @Profile(value = {"local"}) public class DefaultSESConfiguration { @Value("${aws.ses.access-key}") private String accessKey; @Value("${aws.ses.secret-key}") private String secretKey; @Bean public AmazonSimpleEmailService amazonSimpleEmailService() { BasicAWSCredentials basicAWSCredentials = new BasicAWSCredentials(accessKey, secretKey); return AmazonSimpleEmailServiceClientBuilder.standard() .withRegion(Regions.AP_NORTHEAST_2) .withCredentials(new AWSStaticCredentialsProvider(basicAWSCredentials)) .build(); } } | cs |
위에서 생성한 accessKey와 secretKey를 가져와서 AmazonSimpleEmailService 타입의 Bean을 생성해줍니다.
클래스에 @Profile("local")을 선언한 이유는 보통 local 환경에서는 AWS Credentials 인증을 따로 하지 않는 경우가 많아 프로젝트 내부에 key를 넣어서 사용하는데 local이 아닌 EC2 환경의 개발, 스테이지, 운영 서버 같은 경우 key를 넣지 않고 EC2에 IAM Role만 부여해주면 AWS 리소스에 액세스할 수 있습니다. 관련자료는 여기를 참고하시면 됩니다.
1 2 3 4 5 6 7 8 9 10 11 12 13 14 15 16 17 18 19 20 21 | package com.example.demo.configuration.aws; import com.amazonaws.auth.InstanceProfileCredentialsProvider; import com.amazonaws.regions.Regions; import com.amazonaws.services.simpleemail.AmazonSimpleEmailService; import com.amazonaws.services.simpleemail.AmazonSimpleEmailServiceClientBuilder; import org.springframework.context.annotation.Bean; import org.springframework.context.annotation.Configuration; import org.springframework.context.annotation.Profile; @Configuration @Profile(value = {"!local"}) public class EC2MetadataSESConfiguration { @Bean public AmazonSimpleEmailService amazonSimpleEmailService() { return AmazonSimpleEmailServiceClientBuilder.standard() .withRegion(Regions.AP_NORTHEAST_2) .withCredentials(InstanceProfileCredentialsProvider.getInstance()) .build(); } } | cs |
local이 아닌 EC2에 배포되는 애플리케이션이라면 위처럼 설정을 잡아줍니다.
1 2 3 4 5 6 7 8 9 10 11 12 13 14 15 16 17 18 | package com.example.demo.configuration.template; import org.springframework.context.annotation.Bean; import org.springframework.context.annotation.Configuration; import org.thymeleaf.TemplateEngine; import org.thymeleaf.spring5.SpringTemplateEngine; import org.thymeleaf.spring5.templateresolver.SpringResourceTemplateResolver; @Configuration public class TemplateConfiguration { @Bean public TemplateEngine htmlTemplateEngine(SpringResourceTemplateResolver springResourceTemplateResolver) { TemplateEngine templateEngine = new SpringTemplateEngine(); templateEngine.addTemplateResolver(springResourceTemplateResolver); return templateEngine; } } | cs |
HTML 템플릿으로 메일을 전송하기 위해 템플릿 관련 설정도 잡아줍니다.
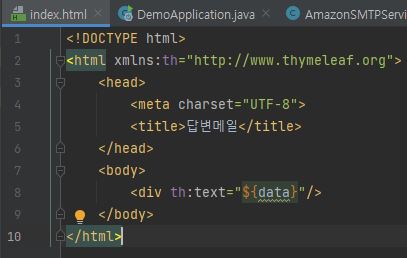
src/main/resources/templates 디렉토리에 index.html을 생성해줍니다.
1 2 3 4 5 6 7 8 9 10 11 12 13 14 15 16 17 18 19 20 21 22 23 24 25 26 27 28 29 30 31 32 33 34 35 36 37 38 39 40 41 42 43 44 45 46 47 48 49 50 51 52 53 54 55 | package com.example.demo.service; import com.amazonaws.services.simpleemail.AmazonSimpleEmailService; import com.amazonaws.services.simpleemail.model.*; import org.springframework.beans.factory.annotation.Value; import org.springframework.stereotype.Service; import org.thymeleaf.TemplateEngine; import org.thymeleaf.context.Context; import java.nio.charset.StandardCharsets; import java.util.Map; @Service public class AmazonSMTPService implements SMTPService { private final AmazonSimpleEmailService amazonSimpleEmailService; private final TemplateEngine htmlTemplateEngine; private final String from; public AmazonSMTPService( AmazonSimpleEmailService amazonSimpleEmailService, TemplateEngine htmlTemplateEngine, @Value("${aws.ses.from}") String from ) { this.amazonSimpleEmailService = amazonSimpleEmailService; this.htmlTemplateEngine = htmlTemplateEngine; this.from = from; } @Override public void send(String subject, Map<String, Object> variables, String... to) { String content = htmlTemplateEngine.process("index", createContext(variables)); SendEmailRequest sendEmailRequest = createSendEmailRequest(subject, content, to); amazonSimpleEmailService.sendEmail(sendEmailRequest); } private Context createContext(Map<String, Object> variables) { Context context = new Context(); context.setVariables(variables); return context; } private SendEmailRequest createSendEmailRequest(String subject, String content, String... to) { return new SendEmailRequest() .withDestination(new Destination().withToAddresses(to)) .withSource(from) .withMessage(new Message() .withSubject(new Content().withCharset(StandardCharsets.UTF_8.name()).withData(subject)) .withBody(new Body().withHtml(new Content().withCharset(StandardCharsets.UTF_8.name()).withData(content))) ); } } | cs |
이메일 전송기능을 담당하는 서비스 클래스를 생성하여 전송기능 로직을 구현합니다.
1 2 3 4 5 6 7 8 9 10 11 12 13 14 15 16 17 18 19 20 21 22 23 24 25 | package com.example.demo.service; import org.junit.jupiter.api.DisplayName; import org.junit.jupiter.api.Test; import org.springframework.beans.factory.annotation.Autowired; import org.springframework.boot.test.context.SpringBootTest; import org.springframework.test.context.ActiveProfiles; import java.util.Map; @SpringBootTest @ActiveProfiles(value = {"local"}) public class SMTPServiceTests { @Autowired SMTPService amazonSMTPService; @Test @DisplayName("Amazon SES로 이메일 전송하기") void send() { String subject = "제목입니다."; String to = "kjh@test.com"; Map<String, Object> variables = Map.of("data", "안녕하세요"); amazonSMTPService.send(subject, variables, to); } } | cs |
기능을 만들었으니 이제 테스트를 진행해보겠습니다.
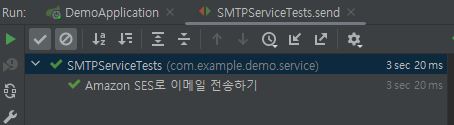
테스트는 정상적으로 성공하였습니다.

이메일도 정상적으로 수신되었습니다.
'Spring' 카테고리의 다른 글
| Proxy기반으로 동작되는 어노테이션을 AspectJ 모듈과 함께 사용할 때 주의할 점 (0) | 2023.03.09 |
|---|---|
| @Profile로 분기처리하여 Configuration을 구성할 때 주의해야할 점 (1) | 2023.02.28 |
| EC2에 배포된 Spring 웹 애플리케이션에서 AWS 리소스에 액세스할 때 주의해야할 점 (2) | 2022.12.31 |
| ActiveProfilesResolver를 이용하여 테스트 코드 실행 시 Spring Profile을 동적으로 주입하기 (0) | 2022.08.06 |
| AWS의 accessKey, secretAccessKey를 안전하게 관리하기 (0) | 2022.05.30 |